
This is a guide on how to set up a Xiaomi Gateway 3 flashed with OpenLumi for you to control its LED lights through Home Assistant.
First things first, props to the people who allowed me to do it, I’ve originally followed these two guides written in Russian to do it myself:
If you get stuck, you may want to check them out for reference.
Before moving forward, you need to have configured MQTT on your Home Assistant, if you haven’t done that, please follow one of these guides to set it up first:
Also, I’m assuming that you already have some experience with Home Assistance and know how to work on the Linux terminal, I’m also assuming you’ve already flashed your Xiaomi Gateway with OpenLumi. If you haven’t, please look at my previous posts.
Now, you need to have installed some packages first, so open the terminal of your Gateway and install these packages:
opkg update && opkg install node git-http mpg123 mpc mpd-fullNow you need to install Lumi:
mkdir /opt
cd /opt
git clone https://github.com/Beetle-II/lumi.git
cd lumi
cp config_example.json config.json
Now we’ll use “vi” to edit the config.json file:
{
  "sensor_debounce_period": 300,
  "sensor_treshhold": 50,
  "button_click_duration": 300,

  "homeassistant": true,
  "tts_cache": true,
  "sound_channel": "Master",
  "sound_volume": 50,
  "mqtt_url": "mqtt://[HA IP ADDRESS HERE]",
  "mqtt_topic": "lumi", #Use the name of your gateway
  "use_mac_in_mqtt_topic": true,
  "mqtt_options": {
    "port": 1883,
    "username": "login here",
    "password": "password here",
    "keepalive": 60,
    "reconnectPeriod": 1000,
    "clean": true,
    "encoding": "utf8",
    "will": {
      "topic": "lumi/state",
      "payload": "offline",
      "qos": 1,
      "retain": true
    }
  }
}
I highly advise you to use the “true” value on the “use_mac_in_mqtt_topic”, if by any chance you have more than one gateway, this will help you differentiate all of them on your Home Assistant.
Also, make sure to change all “lumi” values with the desired name of your Gateway, it will help you differentiate the devices on your home assistance in case you have more than one.
After configuring the config.json file, we will need to start our service, so we launch on the terminal:
node /opt/lumi/lumi.jsThat might result in an error, so after getting feedback from your gateway, use control+c or control+z to exit.
After that, we type on the terminal:
cd /opt/lumi
chmod +x lumi
cp lumi /etc/init.d/lumi
/etc/init.d/lumi enable
/etc/init.d/lumi start
Then type again:
node /opt/lumi/lumi.jsIf you see something like this:
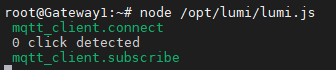
It means you have set it up correctly and it’s now done, you should be able to see your device on your Home Assistant Integrations section, here is how mine looks:

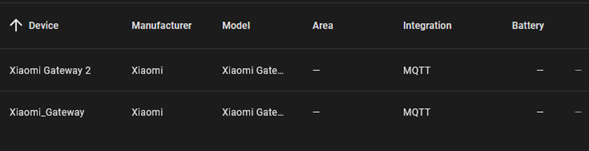
In my case, I have two gateways configured, if you have only one you should see half as much.
That’s it! Happy setups!